Introduction: Torres del Paine
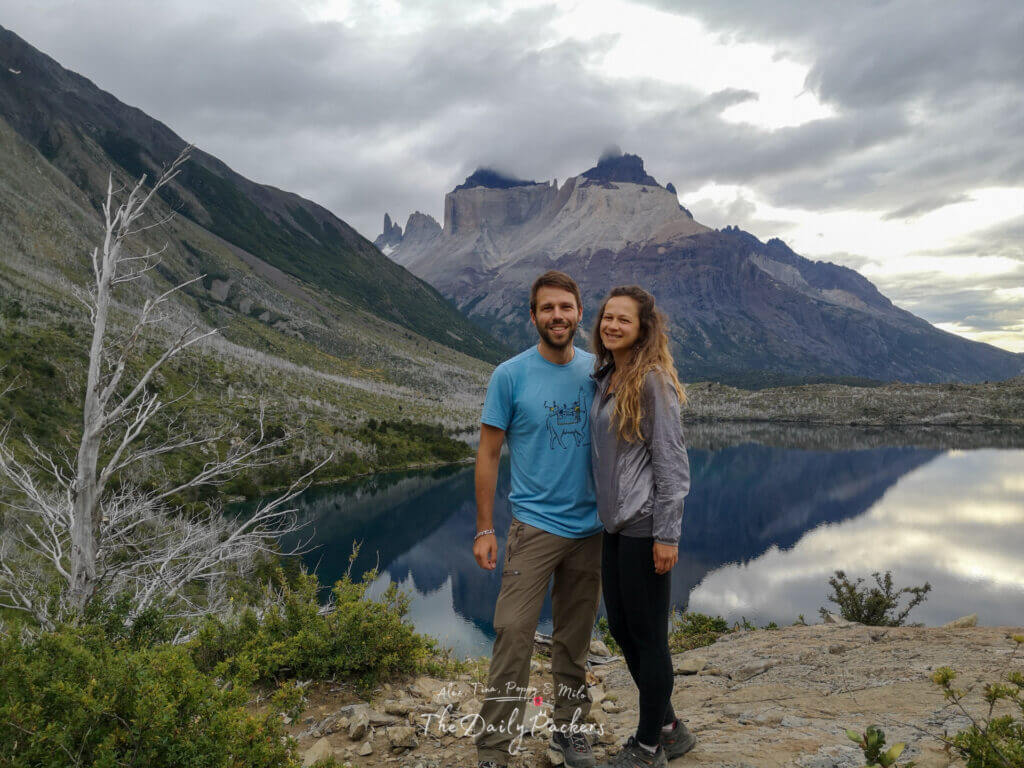
Torres del Paine is a breathtaking national park in Chilean Patagonia, renowned for its dramatic mountain peaks, massive glaciers, and vast golden pampas that provide a habitat for diverse wildlife, including guanacos (relatives of llamas).
The park’s most iconic feature is the trio of towering granite peaks, the Torres del Paine, from which it takes its name.
There are several ways to explore Torres del Paine, but the two most famous multi-day treks are the W-Trek, typically completed in five days, and the O-Trek, a more challenging 10-day circuit that extends beyond the W-Trek. For those with less time, the park also offers incredible day hikes, allowing visitors to experience its stunning landscapes without committing to a multi-day adventure.
This article will tell you all you need to know about hiking Torres Del Paine and how to prepare your W-Trek.

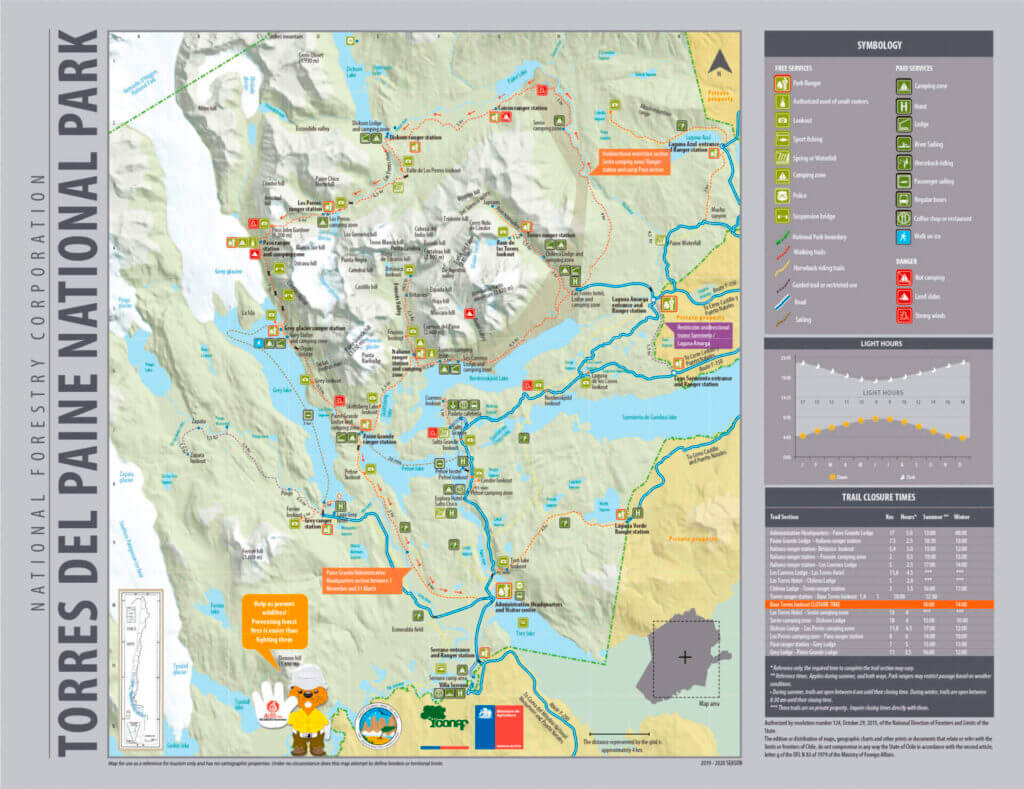
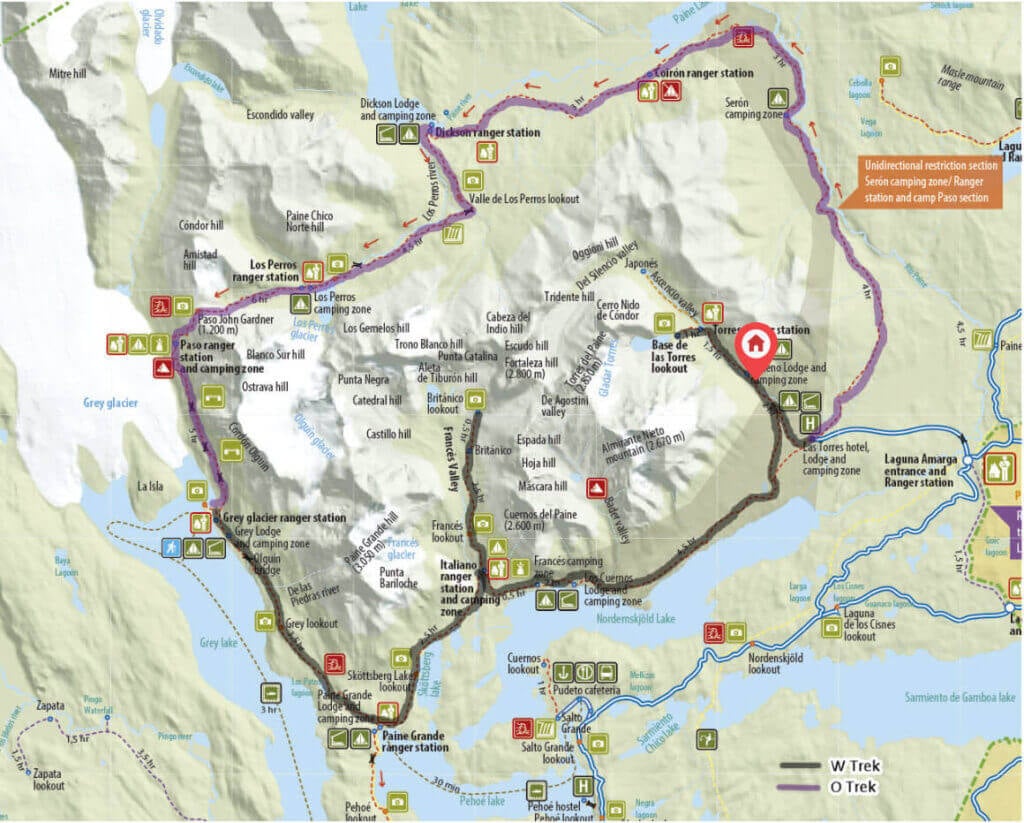
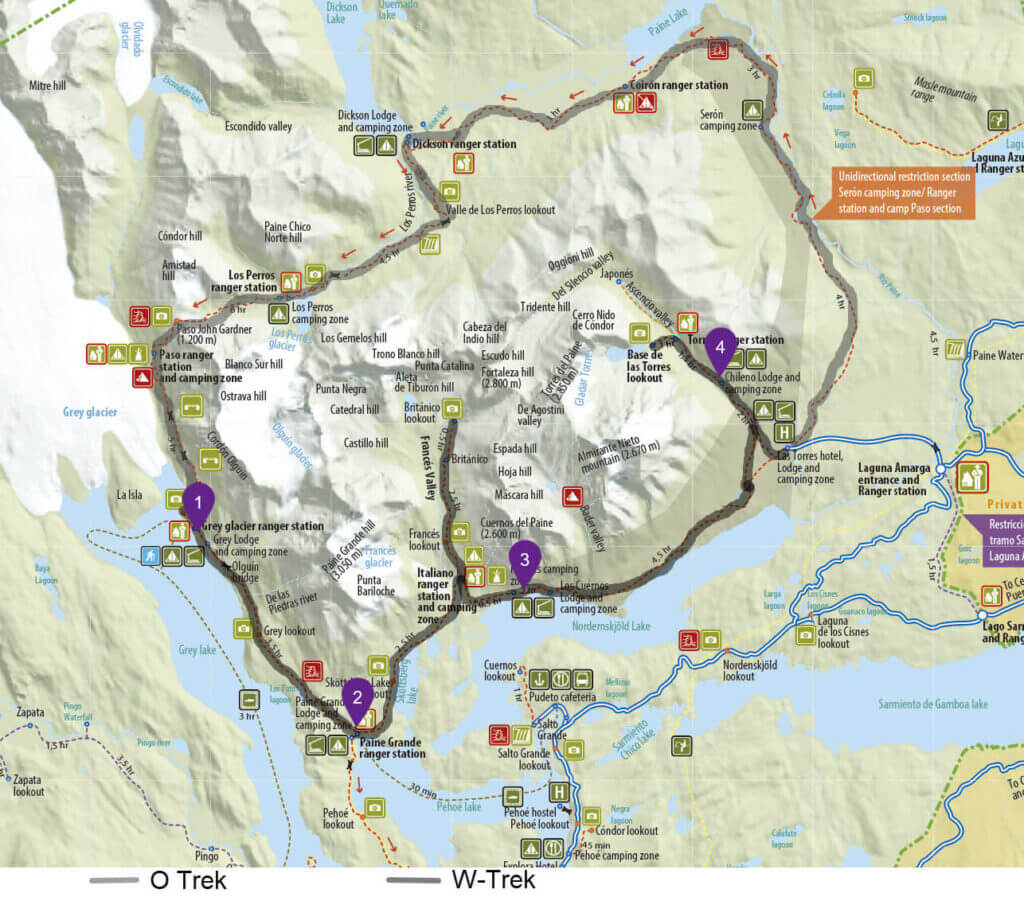
Mapping the Torres del Paine
How to get to Torres del Paine
To reach Torres del Paine, you first need to get to Puerto Natales, the gateway to the park. From Puerto Natales Bus Terminal, several daily buses depart for Torres del Paine National Park, but it’s important to choose the right bus depending on your starting point within the park.
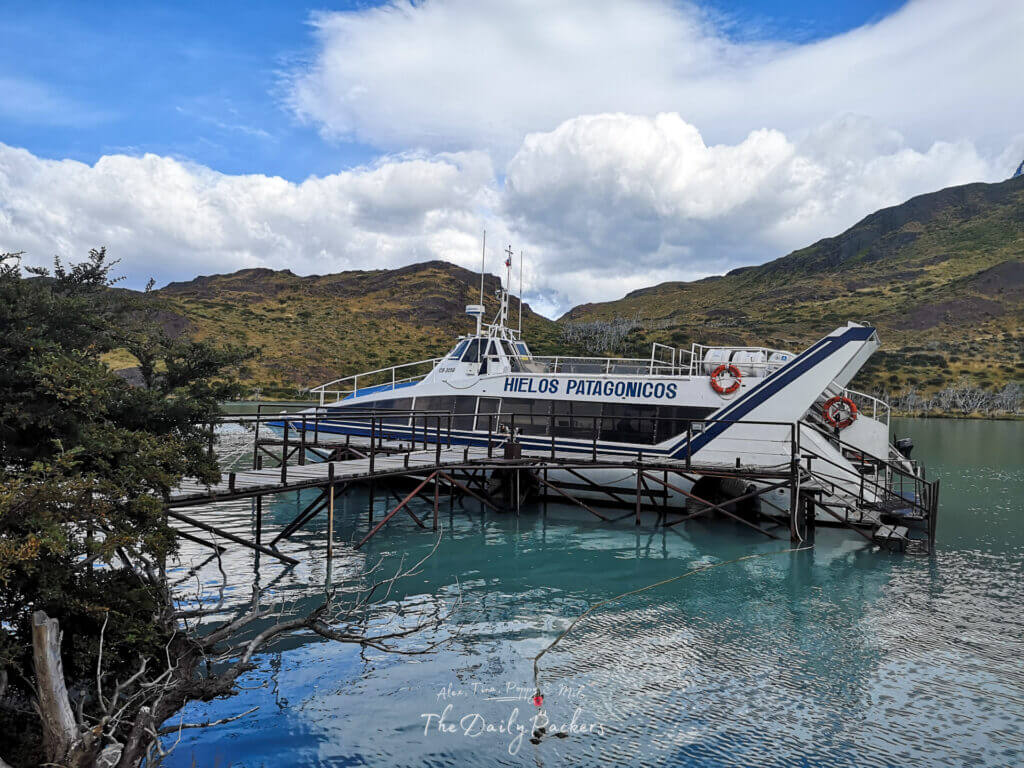
- If you’re starting from Paine Grande (usually for those doing the W-Trek counterclockwise or taking a ferry to Grey Glacier), take a bus to Pudeto and then board the catamaran across Lago Pehoé to Paine Grande.
- If you’re starting from Central Station (commonly used for the O-Trek or W-Trek clockwise), take a bus that goes directly to Laguna Amarga, where you can either start hiking or take a shuttle to Central Station.
Make sure to check the schedules in advance, especially during high season, as buses fill up quickly, and the catamaran operates on a fixed timetable.
If, like us, you are coming from Argentina and El Calafate, getting to Puerto Natales is quite simple. The two cities are 270 km apart, with one border crossing in between.
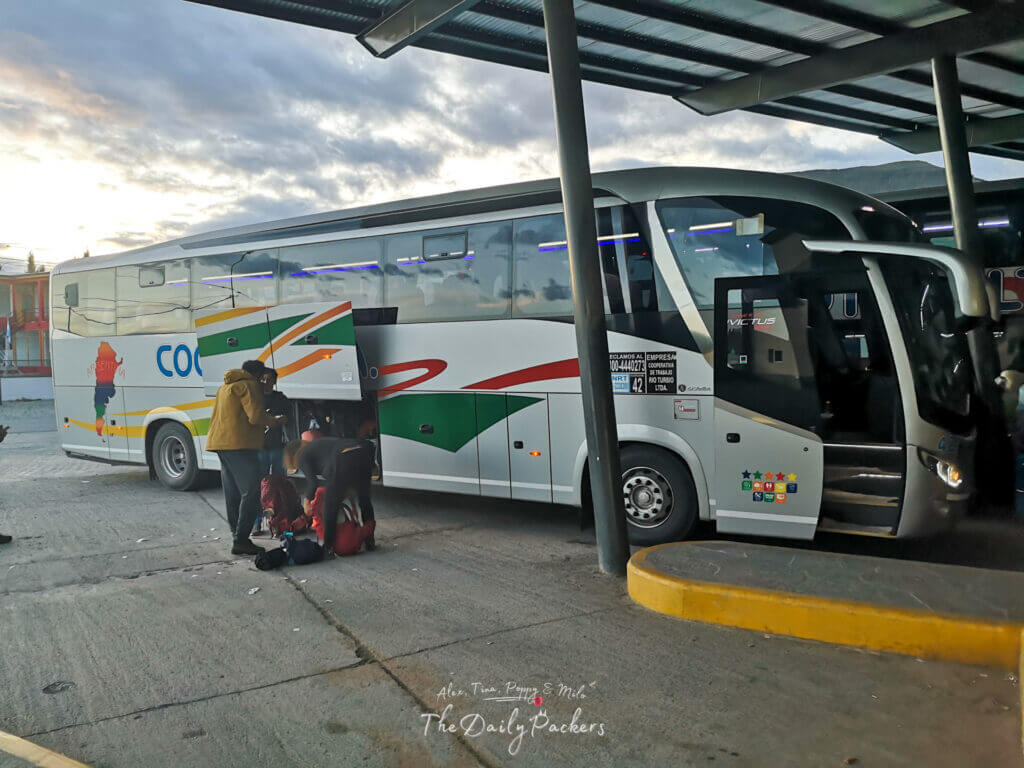
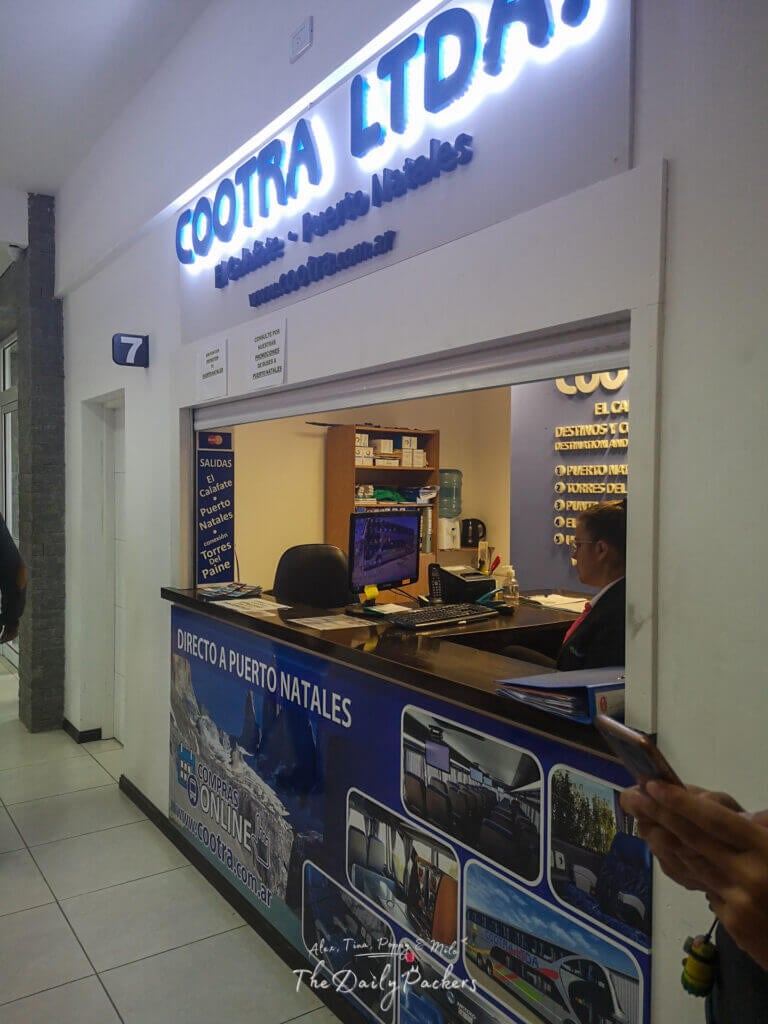
There are several bus companies operating this route, and we recommend buying your ticket in advance, especially in peak season. When we arrived in El Calafate around noon, we went straight to the bus terminal to secure our tickets for the next day.We chose Cootra Ltda, which offered a 7:40 am departure for 1,300 pesos (cash) or 1,500 pesos (credit card).
Other available options included:
- Zaahj Turismo: Departure at 8:00 am, ticket price 1,800 pesos (+10 pesos terminal tax), with no discount for cash payment.
- Bus-Sur: Another company operating the route, with its ticket office located at the Andesmar counter.
The journey itself is smooth, with one mandatory stop at the Chilean border for customs and immigration. Make sure you have your passport ready, and note that fresh food (fruits, vegetables, meats, dairy) is not allowed when entering Chile.
Since our bus was scheduled for 7:40 am, we woke up around 6:00 am, had breakfast, and walked to the bus terminal, which was just a 5-minute walk from our hostel. If you’re looking for a place to stay in El Calafate, we highly recommend Folk Hostel.
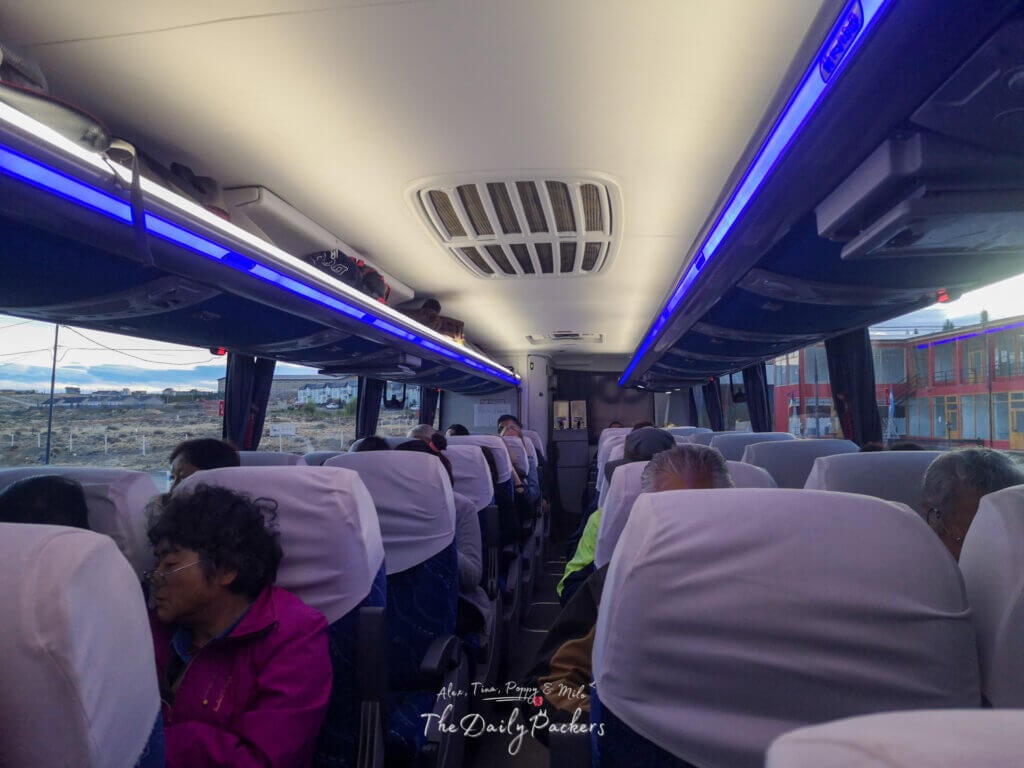
The bus departed at 7:50 am, a slight delay but nothing unusual. The ride was comfortable, with air conditioning (AC), a restroom (WC), USB chargers at each seat, and reclinable seats in a standard single-decker bus with a 2+2 seat configuration.
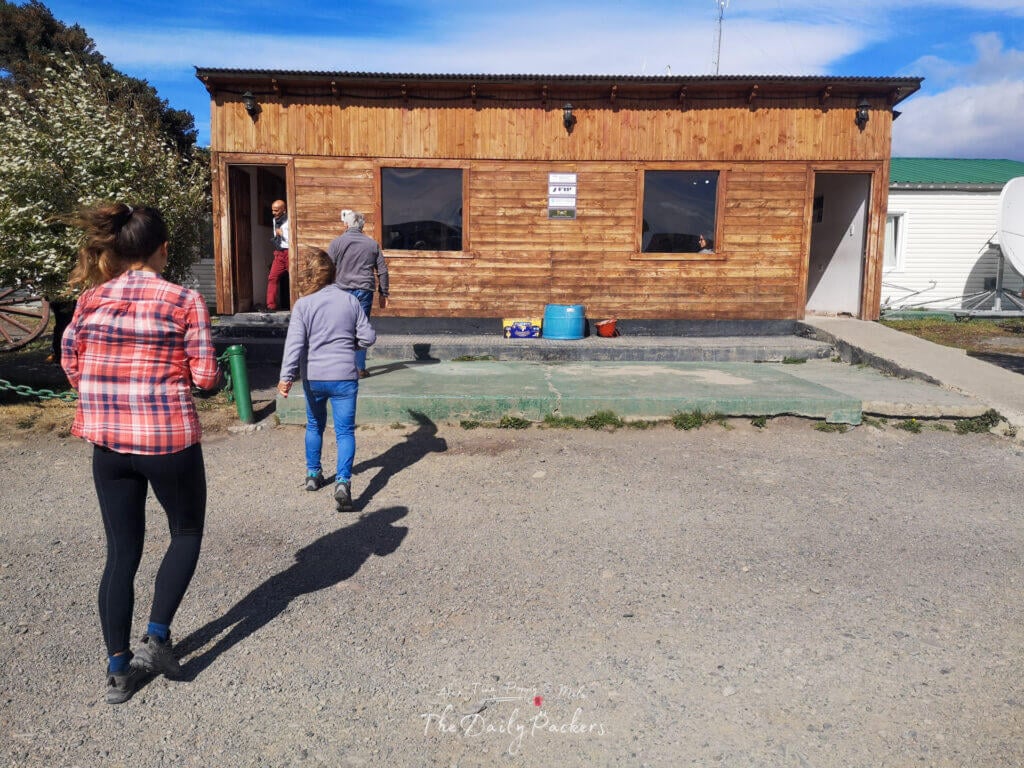
We arrived at the Argentina-Chile border at 11:30 am, but since there were other vehicles ahead of us, we had to wait in line before reaching the immigration checkpoint at 11:40 am.
A customs officer boarded the bus and instructed us to only bring our passports to the immigration office. Once inside, we lined up, waited a few minutes, got our exit stamp from Argentina, and returned to the bus by 11:48 am.
By noon, we were on our way to the Chilean immigration checkpoint.
As we drove between the two borders, we were surprised to find that the road was a dirt road rather than a paved one, which we had expected. But that’s Patagonia for you!
We arrived at the Chilean border checkpoint at 12:12 pm. This time, we had to bring our carry-on backpacks, passports, and a customs declaration form that we had received earlier on the bus.

After getting off the bus, we lined up to have our passports stamped for entry into Chile. Then, we proceeded to an X-ray machine, where our backpacks were scanned (checked for prohibited food items like fresh fruits, vegetables, and animal products, which are strictly controlled in Chile).
By 12:30 pm, we were back on the bus, and after another smooth ride, we arrived in Puerto Natales at 1:32 pm at the bus terminal.
Where to stay in Puerto Natales
Unique Stay near the Park
- Lodge: Cabañas Lago Tyndall
- Tiny House: Torres del Paine
- Lodge: Konkashken Lodge
Or in Puerto Natales:
- Budget: Puma House
- Mid-Range: Toore Patagonia
- High-Range: Hostal Boutique Factoria Patagonia
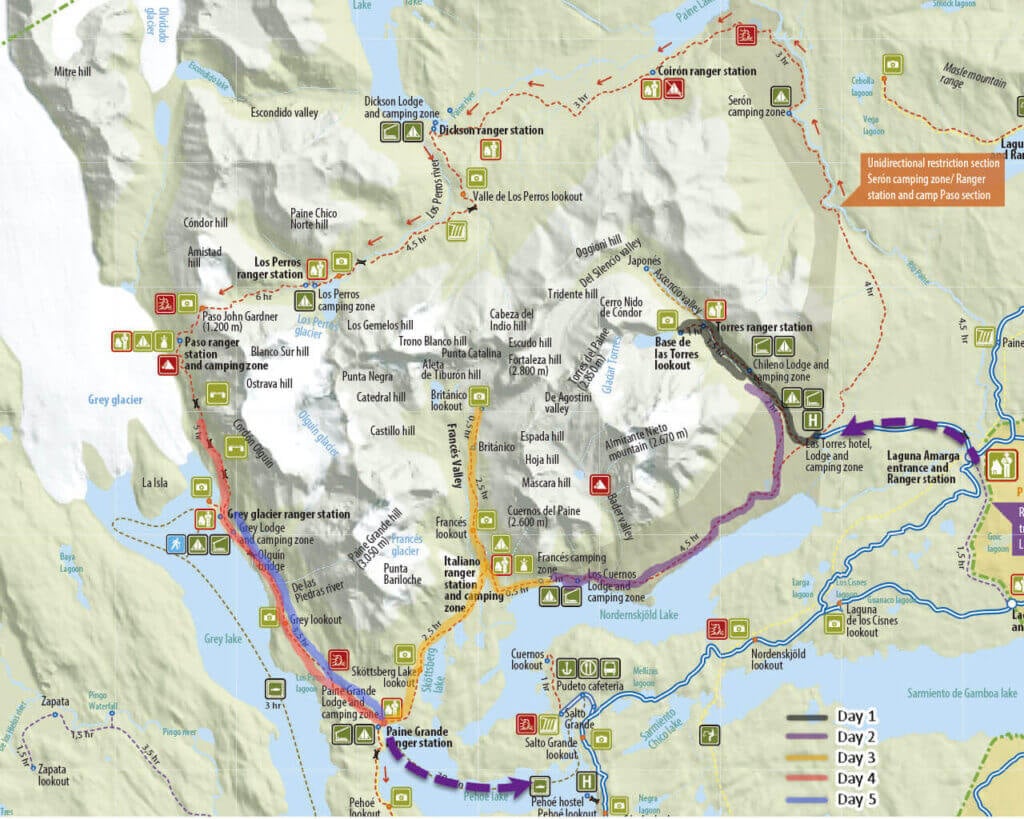
The Various Treks and Stages
The official stages in Torres del Paine
The W-Trek can be hiked in both clockwise and counterclockwise directions, while the O-Trek is only permitted in a counterclockwise direction. Additionally, there are two main starting points for these treks: Paine Grande or Central Station.
The distances between each main point are:
- Paine Grande to Grey: 11km
- Grey to Paso: 7km
- Grey to Paine Grande: 11km
- Paine Grande to Italiano: 7,5km
- Italiano to Britanico: 5,4km
- Italiano to Frances: 0,5km
- Frances to Los Cuernos: 2km
- Los Cuernos to Chileno: 13km
- Los Cuernos to Central: 12km
- Chileno to Las Torres: 4,4km
- Central to Chileno: 5km
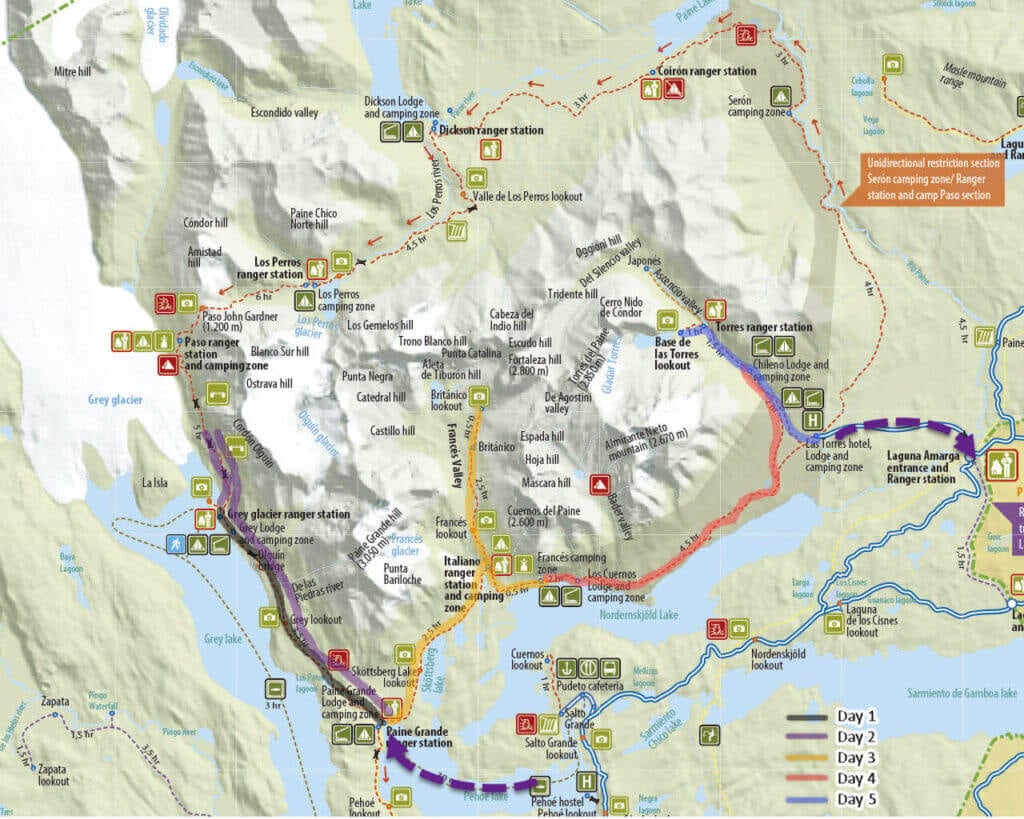
W-Trek: Wet to East: From Pudeto to Laguna Armaga
The standard W-trek West to East: From Pudeto to Laguna Armaga is as follows:
- Day 1: Paine Grande – Grey: 11km
- Day 2: Grey – Paine Grande: 11 to 15km
- Day 3: Paine Grande – Italiano – Britanico – Italiano – Frances/Los Cuernos: 22 to 24km
- Day 4: Frances/Los Cuernos – Chileno/Central: 12 to 15km
- Day 5: Chileno/Central – Las Torres – Central: 14 to 19k
What made us choose the direction was the price of the accommodation we could get. The option we recommend is the W-Trek from West to East (From Pudeto to Laguna Armaga)
- Day 1: Paine Grande – Grey: 11km
- Day 2: Grey – Paine Grande (Morning hike the bridges of the O-Trek): 15km
- Day 3: Paine Grande – Italiano – Britanico – Italiano – Frances/Los Cuernos: 22km
- Day 4: Frances– Chileno: 15km
- Day 5: Chileno – Las Torres – Central: 14km
East to West: From Laguna Armaga to Pudeto
But you can also do the W-Trek from East to West: From Laguna Armaga to Pudeto:
- Day 1: Central – Las Torres – Chileno/Central: 14 to 19km
- Day 2: Chileno/Central – Los Cuernos/Frances: 12 to 15km
- Day 3: Los Cuernos/Frances – Italiano – Britanico – Italiano – Paine Grande: 22to 24km
- Day 4: Paine Grande – Grey: 11 to 15km
- Day 5: Grey – Paine Grande: 11km
Other options:
We opted to do it in 5 days, 4 nights, and it was quite fine this way, but you could make it longer by staying longer in one place or shorter.
Idea for 4-day version:
- Day 1: Paine Grande – Grey – Paine Grande
- Day 2: Paine Grande – Italiano – Britanico – Italiano – Frances
- Day 3: Frances– Chileno
- Day 4: Chileno – Las Torres – Central
Idea for 3-day version:
- Day 1: Paine Grande – Grey – Paine Grande
- Day 2: Paine Grande – Italiano – Britanico – Italiano – Frances – Los Cuernos
- Day 3: Los Cuernos – Chileno – Las Torres – Central
But those would be demanding. If you prefer to take it easy, you could also skip a part of it.
O-Trek
In this option, the trek should be as follow:
- Day 1: Paine Grande – Italiano – Britanico – Italiano – Frances
- Day 2: Frances– Chileno
- Day 3: Chileno – Las Torres – Central
- Day 4: Central – Seron
- Day 5: Seron – Dickson
- Day 6: Dickson – Los Perros
- Day 7: Los Perros – Paso
- Day 8: Paso – Grey
- Day 9: Grey – Paine grande
Or
- Day 1: Paine Grande – Italiano – Britanico – Italiano – Frances
- Day 2: Frances– Chileno
- Day 3: Chileno – Las Torres – Central
- Day 4: Central – Seron
- Day 5: Seron – Dickson
- Day 6: Dickson – Paso
- Day 7: Paso – Paine grande
Weather in Torres del Paine
First, this is Patagonia, so expect rapid and unpredictable weather changes—you can experience all four seasons in a single day!
Second, seasons are reversed in the Southern Hemisphere, meaning that summer (December to February) is winter in the Northern Hemisphere, and vice versa.
On average, temperatures range between 5°C (41°F) at night and 15°C (59°F) during the day. However, strong winds, sudden rain, and even snowfall can occur at any time of the year, so being prepared for all conditions is essential when visiting Torres del Paine.
Tip: We hike with Osprey backpacks and can’t recommend them enough — the Talon 44 and Tempest 40 are comfortable, durable, and great for any adventure.
Best time to Hike Torres del Paine
The best time to hike is between November to early March, during the summertime. In addition, the park is only open from October 1st to April 30th.
- Summer (December – February): Best for Mild Weather & Long Days. Most popular season with long daylight hours (up to 17 hours), Best weather: Warmest temperatures (5–15°C / 41–59°F), Ideal for multi-day treks like the W and O circuits, Very crowded, especially on the W Trek, Higher prices and fully booked accommodations
- Autumn (March – April) → Best for Fewer Crowds & Stunning Colors: Fewer hikers compared to summer, Beautiful autumn foliage in April, Still decent weather (0–12°C / 32–54°F), Unpredictable rain & wind
- Spring (October – November) → Best for Wildflowers & Wildlife: Trails are quieter than in summer, Spring flowers & active wildlife, W Trek reopens in full, Unpredictable weather with strong winds, Nights can be freezing (-3 to 10°C / 27–50°F)
How difficult is Torres Del Paine
Overall, Torres del Paine is not a particularly difficult park to hike. The ascents and descents are moderate, and the distances are manageable. The main challenge arises if you plan on camping and carrying your own food, especially for the O-Trek, as the weight of supplies can significantly add to the difficulty.

Accommodations
Wild camping is strictly forbidden in Torres del Paine due to the presence of wild animals (such as pumas, guanacos, and foxes) and for nature conservation.
However, it is possible to camp near most of the shelters, but reservations are required in advance, sometimes up to three months before your trek.
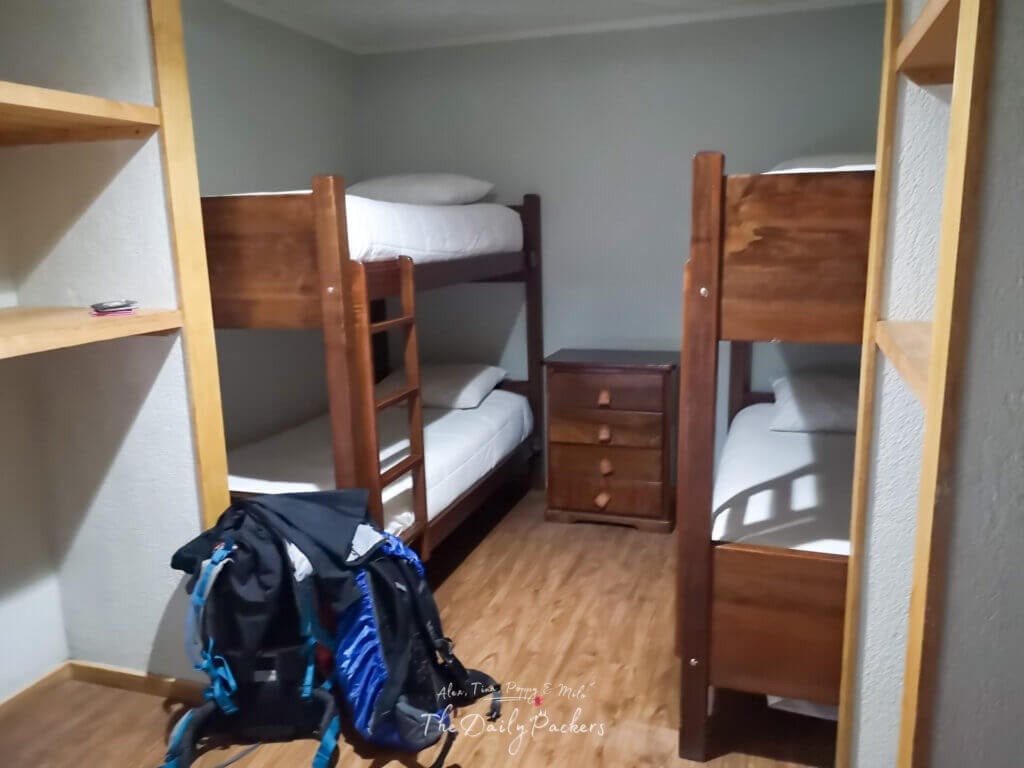
If you’re planning last-minute (like we did), your best options will likely be staying in refuges or organized campsites rather than finding an available free camping spot.

There is a total of 7 possible accommodations on the W-trek:
- Refugio & Camping Grey
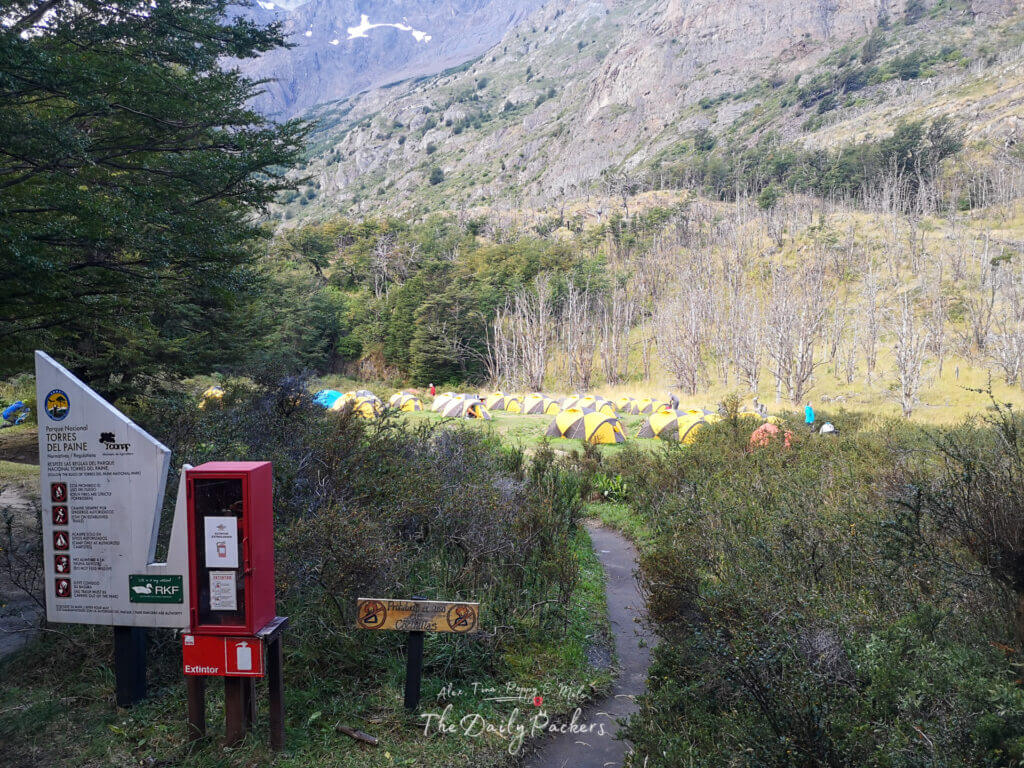
- Refugio & Camping Paine Grande
- Camping Italiano
- Dome & Camping Frances
- Refugio, Cabins & Camping Los Cuernos
- Refugio & Camping Chileno
- Refugio & Camping Central
All of them are private and must be booked directly with the company owning them. There is a total of 3 companies:

Our W-Trek
The W-Trek in Torres del Paine is a 5-day, 4-night trek, and along the route, you’ll need to stay in refuges (lodges) or designated campsites. These must be reserved in advance, as spots fill up quickly, especially during peak season.
- Refugio & Camping Grey
- Refugio & Camping Paine Grande
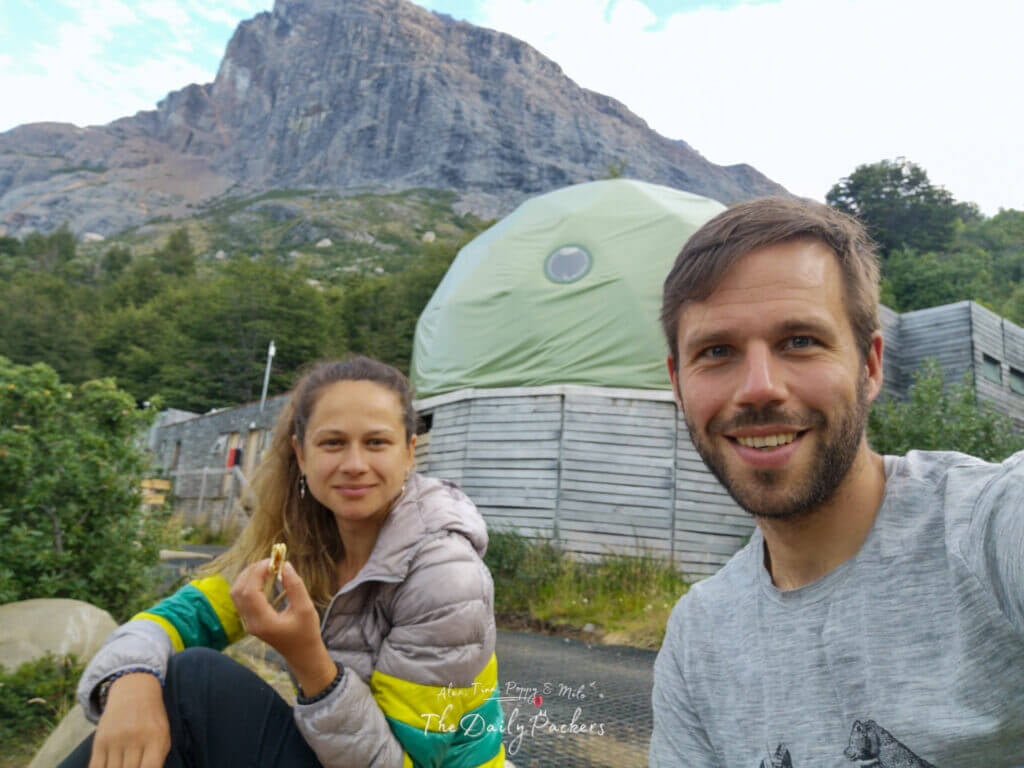
- Dome & Camping Frances
- Refugio & Camping Chileno
Those are the options we took. There are of course some alternatives:
- Refugio, Cabins & Camping Los Cuernos instead of Frances
- Refugio & Camping Central instead of Chileno
We are going from West to East in the W-trek (same way as the O-trek).
On Day 3, the hike from Paine Grande to Frances is already 22 km. If you choose to stay at Los Cuernos, you’ll need to hike another 2 km, making it an even longer day.
Central is the biggest station of them all. But in our W-trek, it made no sense to get there. As the distance between Frances and Central or Frances and Chileno is almost the same. Also, going to central will make you hike an additional 5km on the last day.
We organise it on the 24th of February for a W-trek from 1st to 5th of March, so a week in advance. At this time, we managed to get:
- Refugio & Camping Grey: 2 fully equipped beds in dorms
- Refugio & Camping Paine Grande: 1 fully equipped tent
- Dome & Camping Frances: 2 fully equipped beds in domes
- Refugio & Camping Chileno: 1 fully equipped tent
People we met along the trek and who got a camping spot all organise their trip 3 or 4 months in advance.

Fantastico Sur
Owns the accommodation at Frances, Los Cuernos, Central, and Chileno. To book with them, you have to go to their new website. You will then have to select the place you need, input the date, and select the type of accommodation you want.
Once done, you will have to proceed and validate your order. Once done you will receive an email with a PayPal link to pay for it. Once done, you will receive a confirmation.
Prices for the season 2025/2026 are as follows: Based on double occupancy
Chileno: (Seems like it is only camping nowadays)
- Fully Equipped Camp: November 2025 to March 2026: From $150 p/p
- Semi Equipped Camp: November 2025 to March 2026: From $110 p/p
- Individual Camp (empty spot) November 2025 to March 2026: From $50 p/p

Domos Frances:
- Lodging Rates: November 2025 to March 2026: From USD 207 p/p
- Fully Equipped Camp: November 2025 to March 2026: From USD 150 p/p
- Semi Equipped Camp: November 2025 to March 2026: From USD 110 p/p
- Individual Campsite: November 2025 to March 2026: From USD 50 p/p

Camping Cuernos:
- Fully Equipped Camp: November 2025 to March 2026: From USD 150 p/p
- Semi Equipped Camp: November 2025 to March 2026: From USD 110 p/p
- Individual Campsite: November 2025 to March 2026: From USD 50 p/p
- Mountain Cabins: High season (November to March) USD $320

- Fully Equipped Camp: November 2025 to March 2026: From USD 150 p/p
- Semi Equipped Camp: November 2025 to March 2026: From USD 110 p/p
- Individual Campsite: November 2025 to March 2026: From USD 50 p/p
- Junior Suite: USD $1,310
- Superior room: High season (November to March) USD $980
Vertice
Owns the accommodation at Grey and Paine Grande. Here to book, you can check availability online
After sending them an email, we had to confirm from his email and pay from another one with a PayPal link. And that was done.
Grey Camping and Shelter: for the 2025/2026 Season
- Single bed: $43 USD
- Armed bed: $105 USD
- Camping site: $12 USD
- Bedding kit (per person, per night): $62 USD
- Campsite (per person, per night): $12 USD
- 4-season tent (maximum 2 persons, per night): $46 USD
- Special sleeping bag for the climate of the area (per person, per night): $29 USD
- High-density foam mattress (per person, per night): $ 13 USD
- Towels: $ 11 USD
The type of accommodation is (season 2025/2026) for Paine Grande
- Single bed: $65 USD
- Armed bed: $105 USD
- Camping site: $12 USD
- Bedding kit (per person, per night): $40 USD
- Camping site (per person, per night): $14 USD
- 4-season tent (maximum 2 persons, per night): $46 USD
- Special sleeping bag for the climate of the area (per person, per night): $29USD
- High-density foam mattress (per person, per night): $ 13 USD
- Towels: $ 11 USD

CONAF
Own Italiano campsite, a free camping spot where you must come with your gear. When we were there, it was closed.
Food and Water in Torres del Paine
Bringing your food on the trek means carrying extra weight, but it’s a great way to save money since food at the refuges is quite expensive. While most shelters sell meals and snacks, only one section of the O-Trek lacks food services, so plan accordingly.
If you need to buy supplies along the way, Grey and Paine Grande have well-stocked minimarkets, while Frances and Chileno only offer basic survival items like snacks and instant meals. Cooking your own meals is possible at designated camping areas.
As for water, all shelters provide drinking water, and you can safely refill from streams and rivers along the trail. Just be sure to collect water away from the main path to avoid contamination.
Where to buy food
In Puerto Natales, there are plenty of places to buy food before heading to Torres del Paine. The biggest supermarket is UNIMARC, but for variety and quality, we preferred SUPERMERCADO SUPERFRUT. Both are conveniently located on Manuel Bulnes Avenue, the city’s main street.
Why Superfrut? It has a better selection, especially for hikers looking for essentials like peanut butter, snacks, and fresh produce. If you’re stocking up for your trek, this is the place to go.
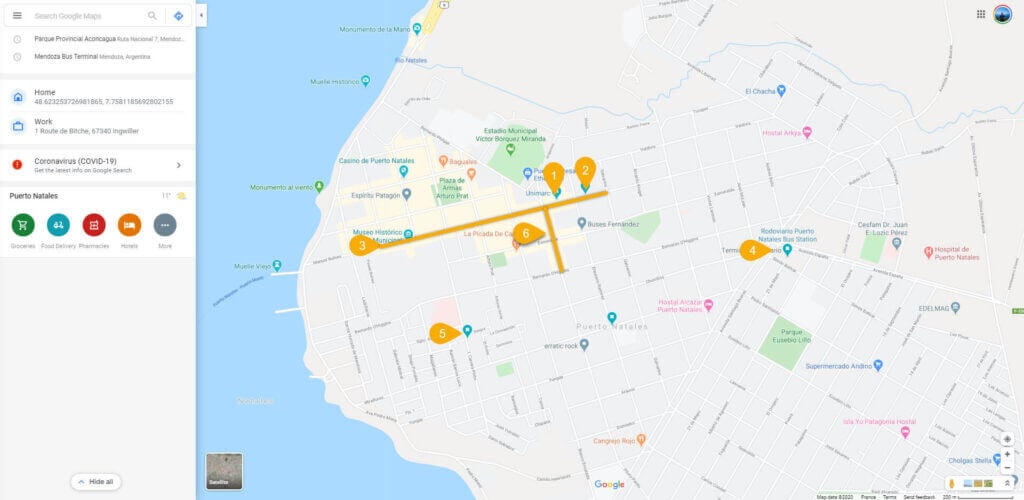
Additionally, on a side street off the main avenue, we found a small shop selling nuts by weight, perfect for trail snacks.
Key locations on the map:
- Unimarc
- Superfrut
- Main Street (Manuel Bulnes Ave.)
- Bus Terminal
- Nuts store
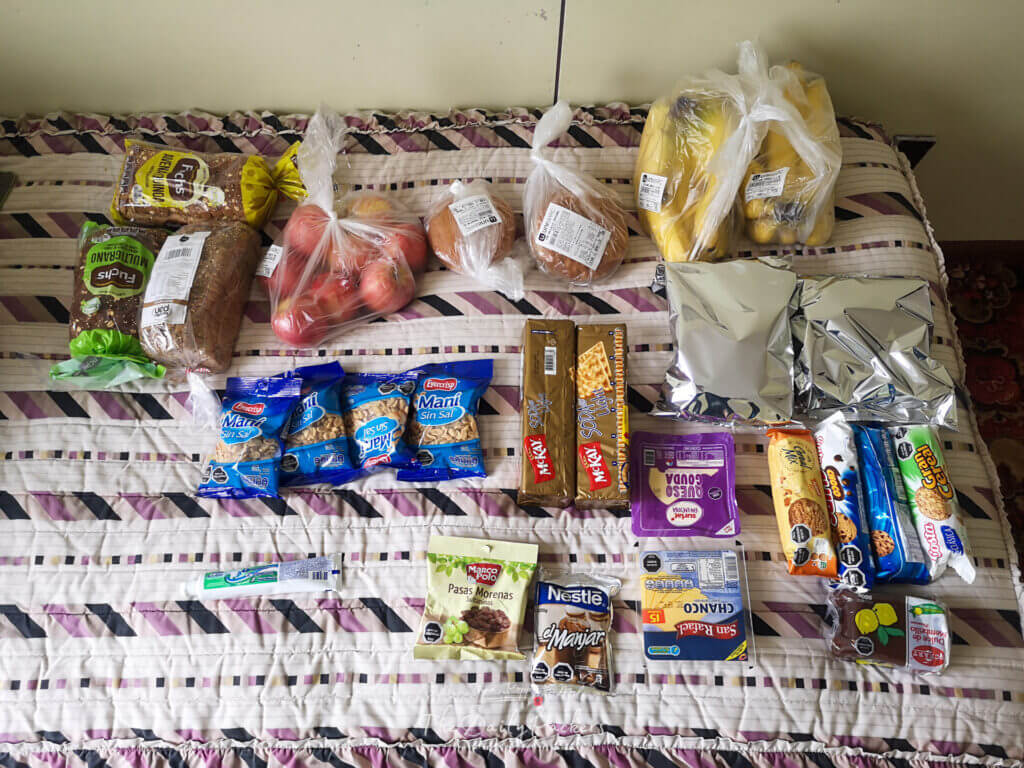
What we brought with us
- 2x 160g packets of peanuts without salt
- 3x packets of cookies
- 2x packets of crackers
- 1x packet of 250g of cheese
- 1x packet of Japanese peanuts
- 1x Jar of 350g peanut butter
- 1x Jar of 200g Dulce de leche (DDL)
- 12x bananas
- 2 packets of cereals
- 2x packets of toast breads
- 6x apples
- 250g of jam (membrillo – quince paste)
- 1x cucumber
- Some cranberries
- Some raisins
- 2x vegans’ calzones
- 8x vegans’ burgers
- Bags of coffee (like tea bag)
Our meal day by day
Day 1
- Breakfast: Accommodation
- Lunch: Vegan calzone
- Afternoon snack: Bananas
- Dinner: Vegan sandwich with tomatoes and soya steak + 160g peanuts
Day 2
- Breakfast: Banana, bread, peanut butter, dulce de leche, coffee bags
- Lunch: Vegan sandwich with vegetable steak and cooked veggies with half pack of cookies and DDL
- Afternoon snack: Bananas
- Dinner: Vegan sandwich with tomatoes and soja steak plus 160g peanuts
Day 3
- Breakfast: Banana, bread, peanut butter, dulce de leche + Coffee from the store there
- Lunch: Vegan sandwich with tomatoes and vegetable steak with half pack of cookies and DDL
- Afternoon snack: Dry cranberries
- Dinner: Integral crackers, cheese, jam, + (bought there) crispy rolls and beers

Day 4
- Breakfast: Cereals and apples plus end of DDL, coffee bags
- Lunch: Banana, bread, peanut butter and cookies
- Afternoon snack: dry raisins
- Dinner: Crackers, cheese, jam, 1x160g peanuts
Day 5
- Breakfast: Cereals and apples, coffee bags
- Lunch: Banana peanut butter sandwich
- Dinner: Cookies and crackers (leftover)
Conclusion
What we brought was in the end enough, and we wouldn’t change much about our food list. Only the calzones, they were delicious though :D
Also, instead of using fresh tomatoes for sandwiches, go for cucumbers or peppers (tomatoes release too much water).
How much cost Torres Del Paine
In 3 months, backpacking in South America, Torres del Paine was one of the most expensive attractions we did. Of course, great trekking over days is to be expected to be expensive. We will detail here all the costs we had and how we could have saved some more.
This Torres del Paine Cost is based on 2 people (couple) during 5 days in the W-Trek, reserving at the last minute. Meaning that options are limited. We will also update the cost for the season 2025 as we visited in 2020.
And remember: Shelter/refuge mostly accepts credit cards. The entrance fee to the park and ferry must be paid in cash.
Transportation
The total cost for two bus tickets to Torres del Paine National Park (round trip) with BUSSUR was 30,000 CLP. With all credit card fees, it ended up costing 34.58€.
For transportation within the park, we had:
- Ferry shuttle from Pudeto to Paine Grande: 46,000 CLP (cash, 53.24€ for 2) – 2025: 27,000 CLP (24€ per person)
- Bus shuttle from Central to Laguna Amarga: 6,000 CLP (credit card, 7€ for 2) – 4,500 CLP (4€ per person)
Food
- Grocery at Unimarc: 41,500 CLP
- Fruit & Veggies: 3450 CLP
- Peanuts: 3000 CLP
- Grocery Superfruit: 10 235 CLP
- Plastic cutlery: 2900 CLP
- 2 Vegan Calzones: 20 000 CLP
Meaning that altogether we spent 81,085 CLP (cash 93,83€) in groceries before and 25,500 CLP (CB, 29,70€) in the park (mostly beers and snacks)
If you do not wish to carry your food, it is also possible to eat in the shelter:
Vertice (Paine Grande and Grey):
- Full board (Dinner, breakfast & packed lunch): 100 USD
- Half board (dinner and breakfast, in that order): $65 USD
- Breakfast: 30 USD
- Lunch on site or packed lunch: 32 USD
- Dinner: 48 USD
Fantasticosur (Frances and Chileno):
- Full board (breakfast, box lunch and dinner*): USD $130.
- Half board (breakfast and dinner*): USD $90.
- Breakfast: USD $35
- Box Lunch (Lunch to go): USD $40
- Lunch*: USD $65.
- Dinner*: USD $65.

Accommodation
5 days, 4 nights meant for two:
- Refugio Grey: 168,10€ (2025: 210€)
- Camping Paine Grande: 108,2€ (2025: 146€)
- Refugio Domo Frances: 224,12€ (2025: 414€)
- Camping Chileno: 94,67€ (2025: 300€)
Total of 595,09€ (2025: 1070)
Here is where we could have saved some money. As we booked a week or so in advance, we couldn’t get a camping spot and had to book a fully equipped camping or shelter.
If we could have done only fully equipped camping
- Refugio Grey: 108,2€ (2025: 146€)
- Camping Paine Grande: 108,2€ (2025: 146€)
- Refugio Domo Frances: 94,67€ (2025: 300€)
- Camping Chileno: 94,67€ (2025: 300€)
Total of 405,74€ (2025: 892€)
If you book in advance and bring all your camping equipment:
- Refugio Grey: 22€
- Camping Paine Grande: 22€
- Refugio Domo Frances: 50€
- Camping Chileno: 50€
- Renting of gears in Puerto Natales: average 90€ per day for 2
Total between 594€
Other costs
The entrance ticket for 5 days (Stay over 3 days) costs 70,000 CLP (cash, 81€). In 2025, it cost 50 USD per person
We got some Torres del Paine Cup for 16,000 CLP (CB, 18,10€)
We will not count that in the total cost, but it’s good to know it:
- Bus from El Calafate to Puerto Natales: 16,25€ (26€ in 2025)
- Bus from Puerto Natales to Ushuaia: 86 000 CLP (cb, 95,84€)
Total for 2
- Transportation park: 60,24€ (2025= 56€)
- Food: 123,53€ (2025: Same)
- Entrance: 81€ (2025: 100€)
- Accommodation: 595,09€ (2025: 1070€)
- Souvenir 18,10€ (2025: same)
The total Torres Del Paine Cost of our W-trek was 877,96€. (2025: 1367€)
Mobile network
Non-existent. The complete park has no coverage at all. If you need to get online, some refuge offers Wi-Fi for a small fee.
Torres del Paine W-Trek Day by Day
Day 1: Puerto Natales – Paine Grande – Grey
The first day of the W-Trek begins with an early departure from Puerto Natales and a stunning journey into Torres del Paine National Park.
Morning Itinerary:
- 6:40 AM – Take the bus from Puerto Natales to Torres del Paine (TDP).
- Along the way, purchase your entrance ticket to the national park.
- Arrive at Pudeto station and take the ferry to Paine Grande.
Main Trek: Paine Grande → Grey Shelter/Camping
- Distance: ~11 km
- Highest Point: 820m
- Lowest Point: 143m
- Estimated Time: ~4-5 hours
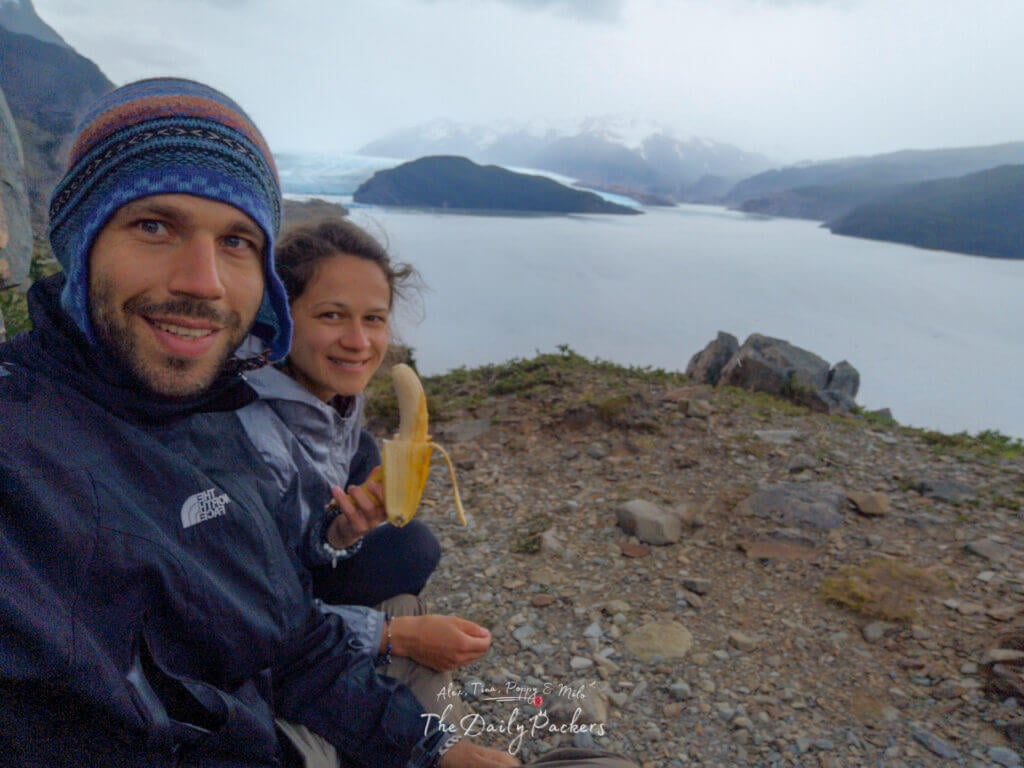
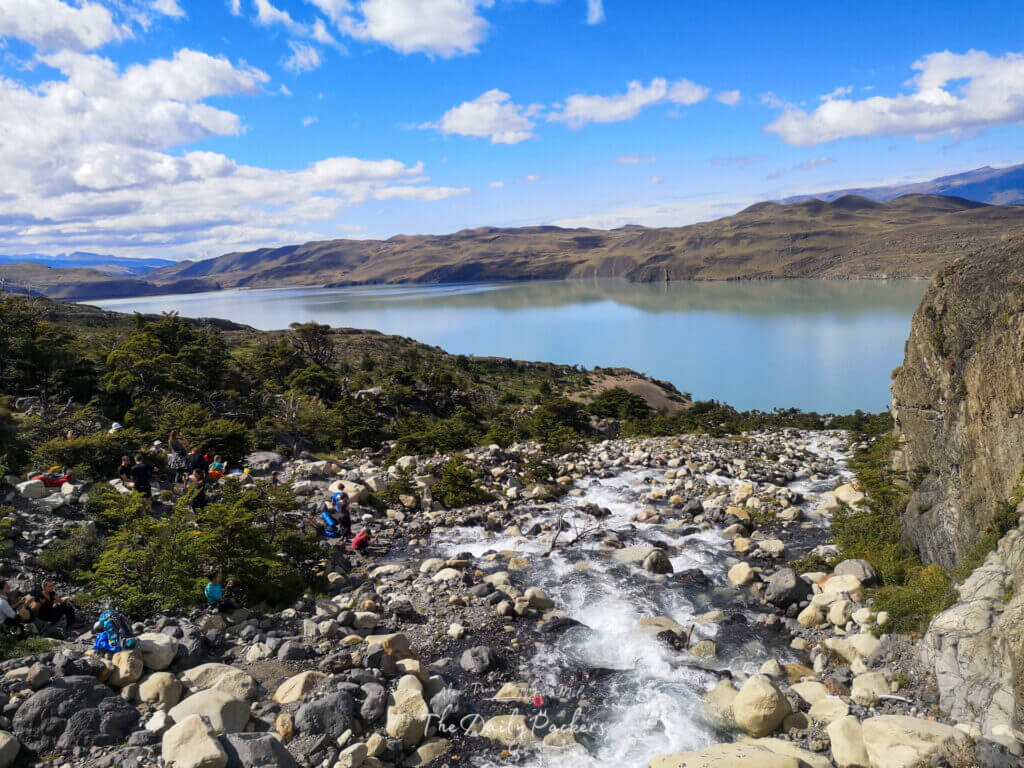
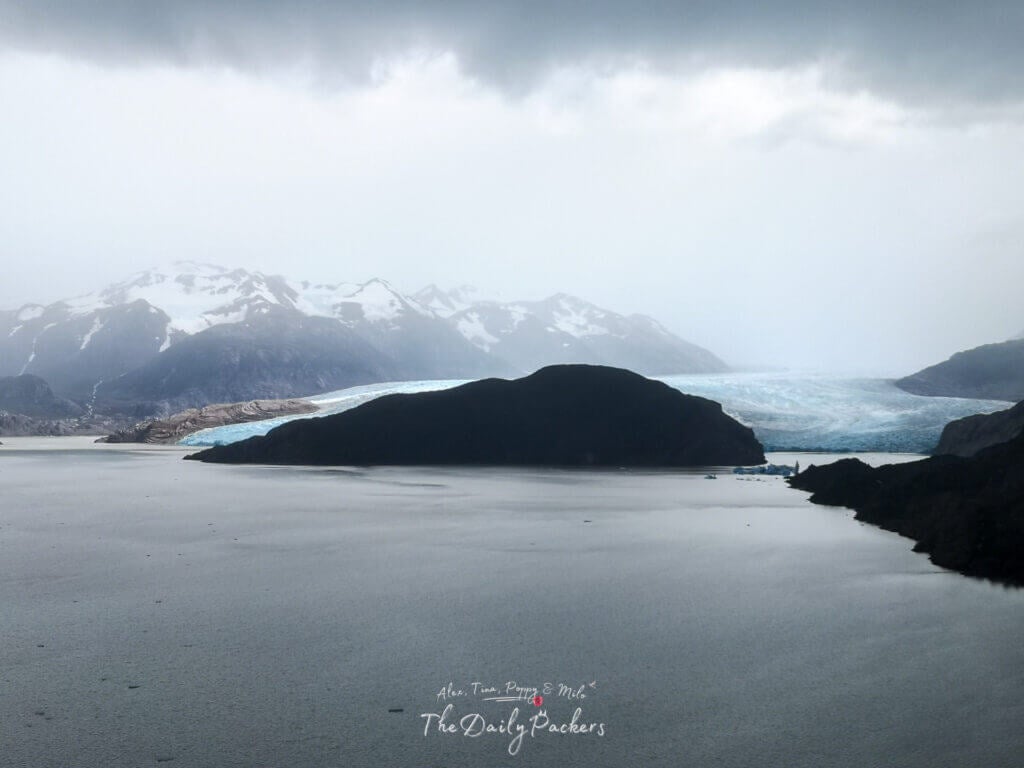
This section of the trail is relatively easy with incredible views of Lago Grey and the surrounding mountains. Once you arrive at Grey Shelter/Camping, drop your bags and explore the area further.
Read: Our complete Torres Del Paine W-Trek Day 1 Guide
Variant 1: Grey Glacier Lookout
- After arriving at Grey Shelter/Camping, hike a bit further toward the Grey Glacier lookout for even more spectacular views.
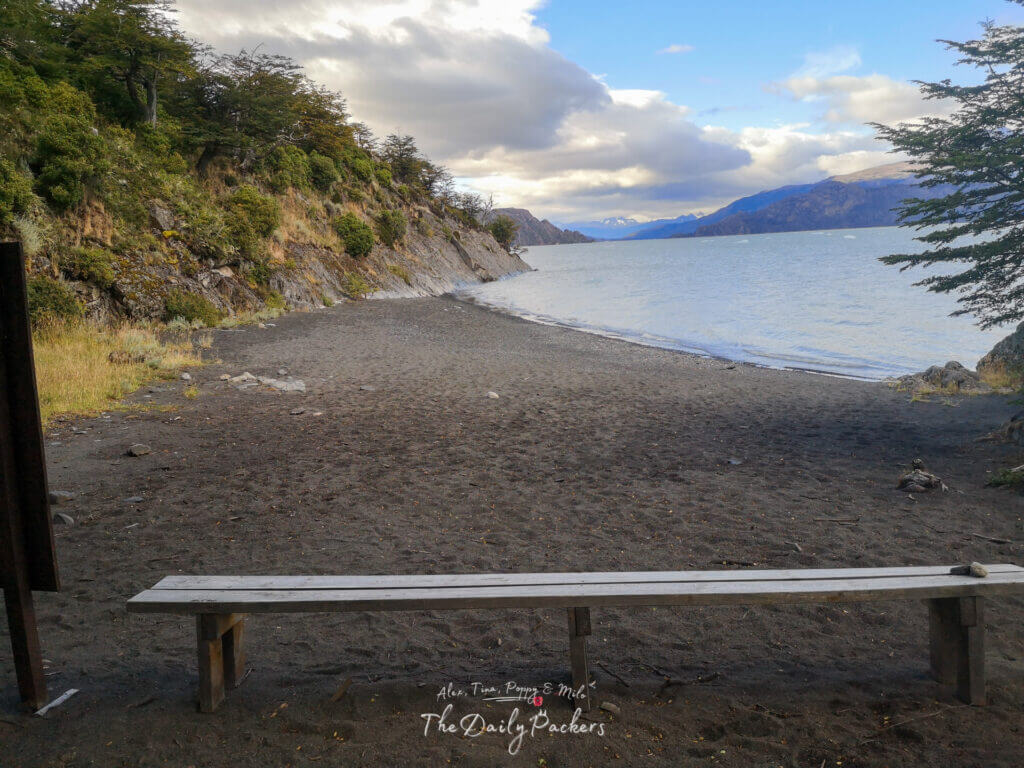
- For a quieter experience, trail down to the ranger station and enjoy a peaceful moment surrounded by nature.
Tip: We hike with Osprey backpacks and can’t recommend them enough — the Talon 44 and Tempest 40 are comfortable, durable, and great for any adventure.
Day 2: Grey – Glacier Lookout – Suspended Bridge – Grey – Paine Grande
If you didn’t do it the night before, drop your bags at Grey Shelter/Camping and hike a bit further to the Grey Glacier lookout. This short detour offers stunning panoramic views of the massive glacier, floating icebergs, and the surrounding mountains.
If you’re looking for a peaceful moment, trail down to the ranger station for a quiet break away from the crowds.
Once you’ve explored Grey Glacier and the suspension bridges, follow the trail back to Paine Grande Shelter/Camping. The return hike is long but relatively easy, with breathtaking views of Lago Grey and the surrounding valleys.
Arrive at Paine Grande Shelter, where you’ll stay overnight and rest before Day 3 of the W-Trek.
Day 2 Trek Statistics
- Distance: ~22 km
- Highest Point: 411m
- Lowest Point: 40m
- Estimated Time: ~6-8 hours
Read: Our complete Torres Del Paine W-Trek Day 2 Guide
Day 3: Paine Grande – Italiano – Britanico – Italiano – Frances
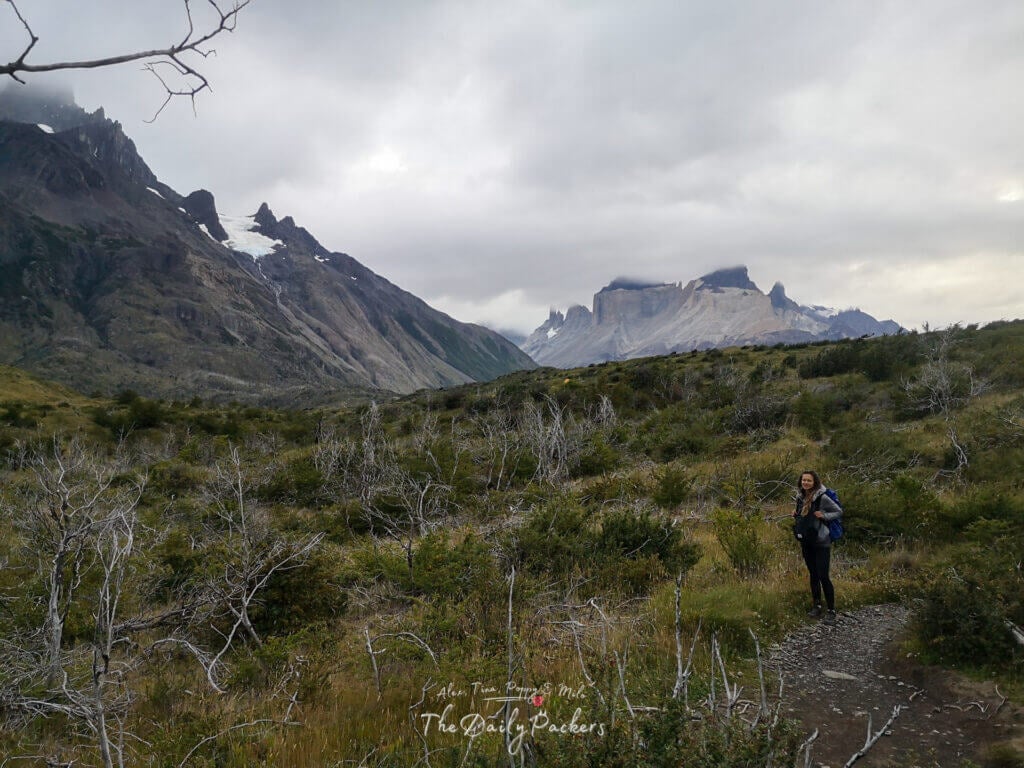
The third day of the W-Trek is one of the most challenging yet rewarding, as it takes you through the breathtaking Valle del Francés (French Valley) and up to the Mirador Británico, one of the best panoramic viewpoints in Torres del Paine National Park.
Start early in the morning from Paine Grande Shelter and follow the trail towards Campamento Italiano. The first part of the hike is relatively flat and easy, offering spectacular views of Lago Skottsberg and Cuernos del Paine (The Horns).
After ~7.5 km (2-2.5 hours), you’ll reach Campamento Italiano, the base camp for the Valle del Francés trek.
Drop your heavy backpack at Campamento Italiano and take a daypack for the challenging ascent into the French Valley. The first viewpoint, Mirador Francés, provides an incredible sight of hanging glaciers breaking off from Paine Grande, creating dramatic avalanches.
Continue up the valley towards the final viewpoint, Mirador Británico (~3 km from Italiano), offering a stunning 360° panorama of jagged peaks, glaciers, and one of the best views in the entire park.
After enjoying the scenery and taking a well-deserved break, return to Campamento Italiano to retrieve your belongings.
From Campamento Italiano, follow the trail towards Frances Domos/Camping, where you’ll stay for the night. The hike from Italiano to Frances is short (around 2 km) but can feel longer after the strenuous French Valley trek.
Arrive at Frances Domos/Camping, check in, and rest for the night before tackling the final day of the W-Trek!
Day 3 Trek Statistics
- Total Distance: ~15 km
- Highest Point: 765m (Mirador Británico)
- Lowest Point: 40m
- Estimated Time: ~8-9 hour
End of Day 3: Settle into Frances Domos/Camping, enjoy the cozy atmosphere, and prepare for the grand finale of the W-Trek: The hike to Mirador Las Torres!
Read: Our complete Torres Del Paine W-Trek Day 3 Guide
Day 4: Frances – Los Cuernos – Chileno
The fourth day of the W-Trek is a transition day as you make your way from Frances Domos/Camping towards Chileno Shelter & Camping, the base for the final ascent to Mirador Las Torres on the following day.
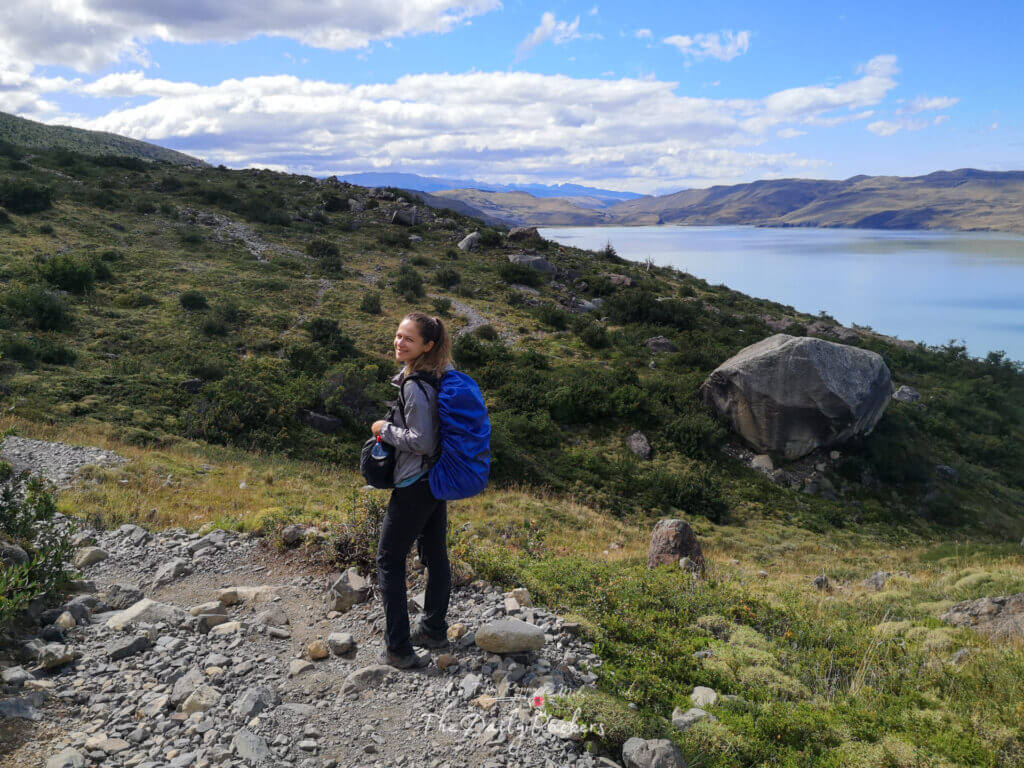
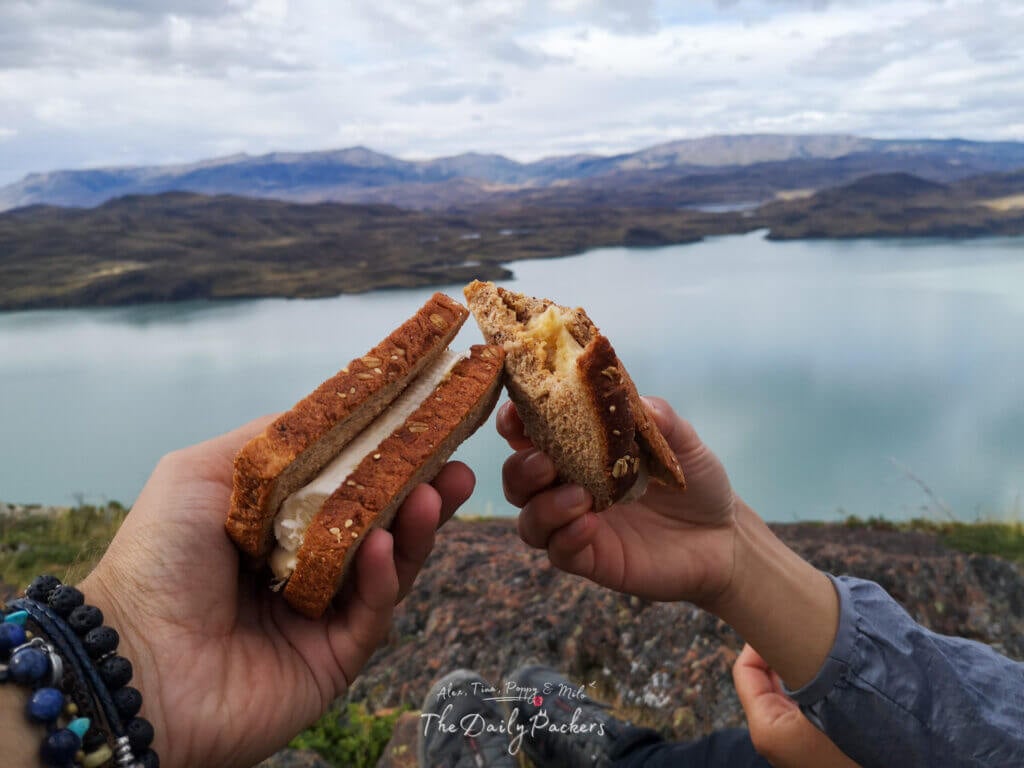
Start your day early by leaving Frances Domos and following the relatively easy trail towards Los Cuernos, a well-known refuge, camping, and hut area. This first stretch offers stunning views of the turquoise waters of Lago Nordenskjöld, with the jagged peaks of Los Cuernos del Paine towering above.
The distance to Los Cuernos is ~5 km (1.5 – 2 hours) on a moderate trail with gentle ups and downs.
Tip: We use the DJI Action 4 to film our vlogs — compact, durable, and perfect for capturing every adventure.
After passing Los Cuernos, the trail follows the lake with some minor elevation changes. You’ll cross small streams and get panoramic views of the valley as you gradually ascend.
After ~6 km (2 hours), you’ll reach the intersection where the trail splits toward either Refugio Central or Refugio Chileno.

Read: Our complete Torres Del Paine W-Trek Day 4 Guide
From the trail intersection, turn towards Chileno, which involves a steeper ascent compared to the earlier part of the trek. The final 4 km will take around 2-2.5 hours, as you gain elevation through a beautiful forested valley, following the Ascencio River.
Arrive at Chileno Shelter & Camping, where you’ll check in, rest, and prepare for the final ascent to Mirador Las Torres at sunrise the next day.
Day 4 Trek Statistics
- Total Distance: ~15 km
- Highest Point: 450m
- Lowest Point: 70m
- Estimated Time: ~6-7 hours
This is your final night on the W-Trek before the most iconic part of the journey—hiking to the famous Torres del Paine at sunrise!
Day 5: Chileno– Las Torres – Central
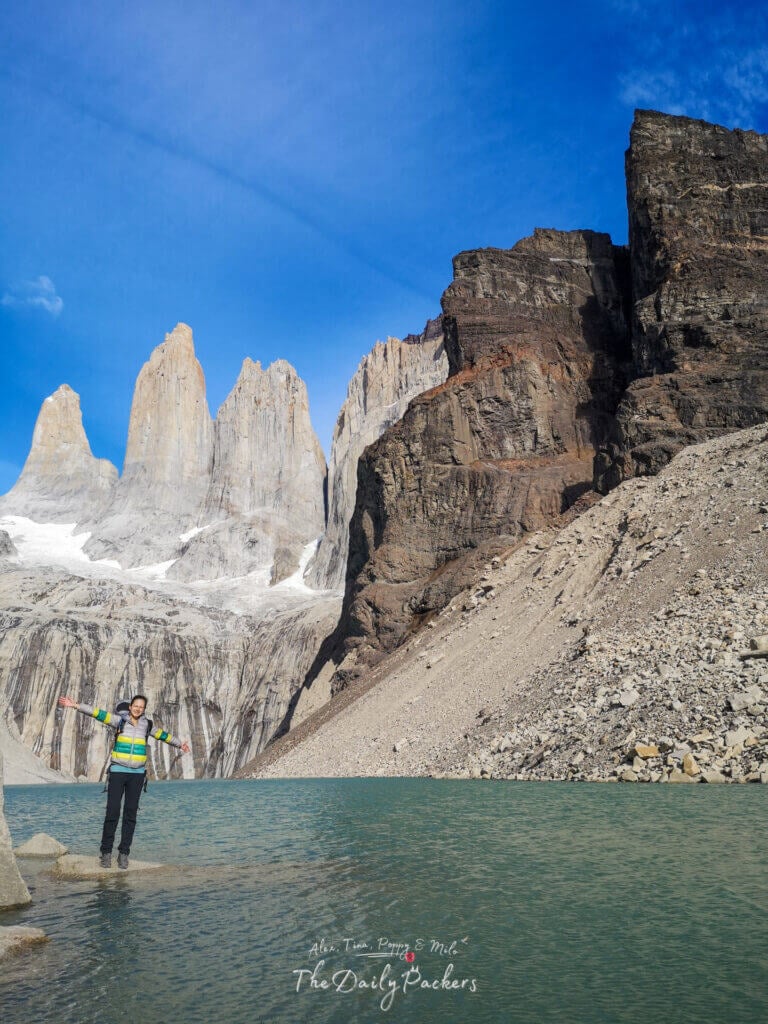
The final day of the W-Trek is the most iconic and rewarding as you make the ascent to Mirador Las Torres, where you’ll witness the majestic granite peaks that define Torres del Paine National Park.
After reaching the viewpoint, you’ll make your way back down to Refugio Chileno, continue towards Central & the Welcome Center, and finally return to Puerto Natales.
Start the hike before sunrise (recommended departure: 4:00 – 5:00 AM). Follow the steep but well-marked trail from Chileno Shelter, gradually climbing alongside the Ascencio River.
After passing through a beautiful lenga forest, reach the base of the moraine—the final and most challenging section. The last kilometer is the steepest, climbing 300m over loose rocks until you arrive at Mirador Las Torres.
After 2-3 hours of hiking, you’ll arrive at the famous Las Torres Viewpoint (Mirador Las Torres). If you start early, you might catch the sunrise, when the towers glow orange and pink—one of the most breathtaking sights in Patagonia.
Take time to enjoy the view, capture photos, and soak in the moment before heading back down.
Read: Our complete Torres Del Paine W-Trek Day 5 Guide
The return from Mirador Las Torres to Chileno is easier but still requires caution on the steep moraine. Arrive at Chileno Shelter, take a break, and grab a quick snack or lunch before the final descent.
Continue down to Refugio Central & the Welcome Center, where your W-Trek officially ends.
From Central, take the shuttle to Laguna Amarga (ticket required). At Laguna Amarga, board the bus back to Puerto Natales, arriving in town by early evening.
Day 5 Trek Statistics
- Total Distance: ~14 km
- Highest Point: 865m
- Lowest Point: 140m
- Estimated Time: ~6-7 hours


Excellent travel blog! We plan to visit in Dec 2025. I noticed your article was updated in March 2025, but your campsite cost was much cheaper than what I made in June 2025 for our reservation in Dec 2025.
Your article: “The type of accommodation is (November to March):
Camping spot: 21 USD per person. 11 USD more if you are alone.
Fully-equipped campsite: 49 USD per person”
I paid $300 USD for a 2-person fully equipped campsite at all 3 sites Central, Chileno and Frances. I wonder why this is so much different.
We are happy if our blog can help you :)
It seems the pricing has been completely changed for the coming season. There is even a new website. We will re-update all our articles on Torres Del Paine with the new pricing.
Thank you very much for making us aware about that.
We hope that you will enjoy Torres Del Paine as much as we did.
West is on the left, East is on the right. You did West to East.
We can’t believe we didn’t see that mistake before :D Thank you very much. It has been corrected.