Introduction
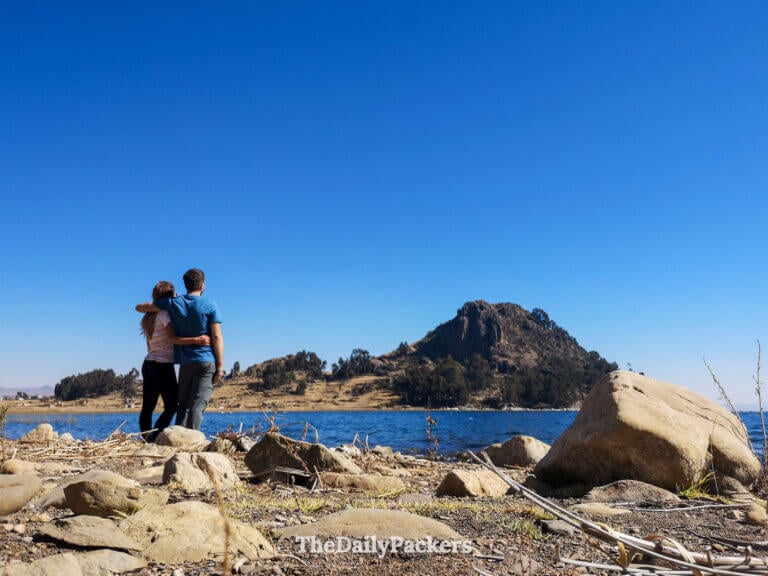
We discovered the Yampupata hike during our stay in Copacabana, Bolivia, the day after visiting Isla del Sol, and it instantly became one of our favorite experiences in the vicinity of Lake Titicaca. It’s a beautiful coastal walk that takes you through tiny villages, peaceful bays, viewpoints, and quiet stretches of countryside. If you want something less touristy than Isla del Sol but just as stunning, this hike is perfect. We guarantee it will stay in your memory like the Uyuni Salt Flat.
There are three ways to visit Yampupata:
- Walk from Copacabana to Yampupata, then return by taxi
- Take a taxi to Yampupata and walk back to Copacabana (this is the option we chose)
- Walk both ways, for the ultra-motivated
To give you an idea of the route, here’s the order of the hike if you start in Yampupata and walk back to Copacabana: Yampupata → Sicuani → Titicachi → Gruta de Lourdes → Islas Flotantes → Copacabana
And if you prefer avoiding the full coastline, you can also pass through Sampaya, a more traditional village with a beautiful viewpoint.
It’s an easy-to-moderate walk with stunning views of Lake Titicaca from start to finish — a perfect way to spend a full day around Copacabana.


Getting there
We chose to start the hike from Yampupata rather than walking from Copacabana for one simple and very practical reason: you can always find a taxi in Copacabana, but there’s no guarantee you’ll find one waiting in Yampupata.
There are occasional minibuses (vans), but their schedule is unpredictable, and you may end up stuck. The easiest solution is to ask your hostel or hotel to arrange a taxi — ours organized one in less than five minutes.


The ride from Copacabana to Yampupata takes about 35 minutes and costs about 80 bolivianos (Bs) but to be sure, verify with your hotel beforehand. If the driver tries to charge more (it happens), simply hand over the amount your hotel told you and step out of the taxi. That’s the normal price.
One thing we quickly noticed on the way: the trail is far from crowded. We crossed only a family of four and a small group of three doing the hike in the opposite direction. That’s it — nine people on an entire coastal trail. If you’re looking for something peaceful and untouched, this hike truly is a gem.

When to Hike
This hike is best done on a clear, sunny day to fully enjoy the views and avoid muddy or slippery conditions. We recommend:
- Starting in the morning, ideally between 9:00 and 10:00 am, so you have enough time to walk back to Copacabana without rushing.
- Choosing a day with dry weather — the trail is exposed, and rain would make it less enjoyable.
- Hiking during the dry season (May to October) if possible. Days are sunny and crisp, and visibility is excellent.
- In the wet season (November to March), early starts are even more important, as afternoon showers are common.
We hiked under a perfectly blue sky with warm temperatures, but keep in mind that at 3,800 meters, the weather can change quickly — sunburn and cold wind can both hit in the same day.


The Yampupata Hike
Start the Yampupata Hike
Your taxi will drop you at the edge of Yampupata, right by the tiny port. From there, the best way to start the hike is to head up the small hill just in front of you. There’s no marked path — you simply make your own way up.

At the top, you’ll find an old telephone booth (yes, really) and one of the first panoramic views of the day. Lake Titicaca looks incredible from up there.

Tip: We use the DJI Action 4 to film our vlogs — compact, durable, and perfect for capturing every adventure.
Leaving Yampupata
To exit the village and pick up the main trail, follow the small path that goes down from the viewpoint toward the water. It leads to a little beach accessible by stairs. The water is crystal clear, and the spot could be beautiful… if only the beach wasn’t so neglected. Still, it’s worth a quick look.

You can’t continue along the shoreline — it dead-ends — so you’ll need to go back up the same stairs.

From there, just cross the open fields, walk past the local houses, and greet the people you meet along the way (everyone says hello here). Keep going straight until you reach the main dirt road, where the actual coastal trail begins.

Walk from Yampupata to Sicuani
This section of the hike is pretty straightforward — just follow the dusty road and the occasional trail signs along the way. It’s an easy walk, and what makes it special is the slow rhythm of daily life around you. You’ll pass small fields, adobe houses, and locals tending to their animals or working the land. If you’re lucky, you might even end up chatting with someone; people here are incredibly warm.

During our hike, every single person we crossed greeted us with a “Buenas tardes!” or “Hola!”. It’s such a simple thing, but it really adds to the charm of the trek.
From time to time, you’ll spot old stone paths from the Spanish era branching off the road. We didn’t use them, as many seemed to lead nowhere or end abruptly. Stick to the main road — it’s the easiest and most reliable route.

Just be aware that whenever a car drives by, it kicks up a lot of dust… so maybe step aside and cover your face for a second before continuing.

Tip: We use the DJI Action 4 to film our vlogs — compact, durable, and perfect for capturing every adventure.
Stop for Lunch in Titicachi
By the time you reach Titicachi, it’s the perfect moment for a break — and honestly, bringing your own lunch is the smartest choice. We did exactly that. We picked up everything we needed at the small market in Copacabana and packed simple sandwiches for the hike. It turned out to be the best option.

There are a few restaurants and guesthouses scattered along the trail, but when we passed by, every single one was closed. So don’t rely on them.

The good news? You’ll have no trouble finding a quiet, beautiful spot to sit down and eat. The views of Lake Titicaca from this section of the trail are incredible, and having lunch completely alone with those landscapes around you is a highlight in itself.

Tip: We never travel without our DJI Mini 3 PRO drone anymore — it’s totally worth having to capture places from a whole new perspective.
Visit the Gruta de Lourdes
A little further along the trail, you’ll come across the Gruta de Lourdes — a small cave tucked into the hillside with a biblical statue inside. It’s a quick stop, nothing dramatic, but it adds a nice cultural touch to the hike.

There’s no official entrance fee, but you may meet a local sitting nearby who will ask for a small tip. It’s up to you whether you want to give something or not.
It’s worth stopping for a minute, stepping inside the cave, and taking in the quiet atmosphere before continuing toward Copacabana.

Here are all your accommodation options in Copacabana
Walk Along the Hidden Rock Beach
When you leave the Gruta de Lourdes, you can either head back to the main road… or take the much nicer option: walk down toward what looks like an abandoned campground.
We went through it, hopped over a small stream, and then followed the shoreline — and honestly, it became one of our favorite parts of the entire Yampupata hike.

The coast opens up into a massive rock beach (and when we say rock, we mean BIG BIG BIG rocks), stretching all the way back toward the main road. The landscape feels untouched, wild, and incredibly peaceful.
The best part? We were completely alone. No dust, no traffic, just the sound of the lake and the crunch of the rocks under our feet. It’s the perfect detour if you want a more scenic and quiet section of the hike.

Tip: We use the DJI Action 4 to film our vlogs — compact, durable, and perfect for capturing every adventure.
Visit the Islas Flotantes (Floating Islands)
As you keep walking along the Yampupata trail, you’ll eventually reach the Islas Flotantes — a series of small, man-made floating islands anchored just off the shore. To get there, simply follow the trail downhill until you reach the pier.
Each floating island has its own little restaurant serving fresh trout, and you can pick whichever one looks the most inviting. Some even have a second floating platform behind them that you can explore — it’s a fun and quirky stop along the hike.

If you enjoy fish, this is supposed to be one of the best places to try trout on Lake Titicaca. The fish is taken directly from the net cages set in the water around the islands, so it doesn’t get fresher than that.
Even if you don’t plan on eating, walking out onto the floating platforms and enjoying the quiet lake views is a really nice break before continuing the hike.

Finish the Yampupata Hike in Copacabana
From the Islas Flotantes, all that’s left is to keep following the road back toward Copacabana. This final stretch is easy to navigate — just stay on the main path and enjoy the changing views as the town slowly appears in the distance.

We started our hike at around 10:20 AM and made it back to Copacabana at 4:30 PM, covering roughly 20–21 km in total. It’s a long walk, but absolutely doable with a steady pace and a few breaks along the way.
Reaching Copacabana on foot after a full day out is such a satisfying moment — grab a cold drink in town, stretch your legs, and enjoy that well-deserved end-of-hike feeling.

Here are all your accommodation options in Copacabana
What to Bring
The Yampupata hike is long, remote, and fully exposed to the elements, so you’ll need to bring everything you might need for the day. Here’s what we recommend packing:
- At least 2 liters of water per person
- Sun cream (the sun at altitude is no joke)
- Lunch box / sandwiches
- Snacks (fruit, nuts, chocolate — anything easy to eat on the go)
- A hat or cap
- A light sweater in case the wind picks up
- Good walking shoes (the trail is dusty and uneven in places)
- Cash (in case you want to eat at the floating islands or tip locals)
You won’t find shops or food stalls along the way, so it’s better to bring more than you need rather than not enough.

A Bit of History About the Yampupata Hike
Yampupata is a tiny rural village located on the tip of the peninsula that juts into Lake Titicaca, right across from Isla del Sol. At its closest point, the island is only about 1 km away, which is why many locals and travelers use Yampupata as an alternative departure point to reach the island by boat. Before tourism existed, this trail was simply the local route connecting the scattered communities along the peninsula — farmers, fishermen, and families who still live off the land today.
Along the way, you’ll pass small hamlets like Sicuani, Titicachi, and Sampaya, giving you a glimpse into traditional Aymara life. People here have been cultivating potatoes, quinoa, and herding sheep and llamas for generations. Don’t be surprised if every local you meet greets you with a warm “Buenos días” or “Buenas tardes.”
One of the most curious stops on the trail is the Gruta de Lourdes, a small shrine dedicated to the Virgin Mary. Similar to the more famous ones in France or Portugal, this cave has become a humble pilgrimage site for Bolivian families who come here to pray, light candles, and ask for blessings. It’s simple, quiet, and unexpectedly atmospheric — especially with the lake shimmering in the background.

Where to Stay in Copacabana
Copacabana has a surprisingly great range of accommodation for such a small town, and most places sit on the hillside overlooking Lake Titicaca, which means dreamy sunrises, golden sunsets, and those peaceful lake views you never get tired of.
Here are three places we recommend, depending on your style and budget:
(€) Jardín Andino Hostal: A simple and cozy guesthouse with a very local feel. Rooms are basic but clean, the owners are lovely, and the little garden is perfect for a quiet coffee in the morning. It’s a great choice if you’re traveling on a budget but still want something charming and peaceful.
(€€) Hotel La Cúpula: This is where we stayed — and honestly, our favourite accommodation in all of Bolivia. The rooms feel like little private casitas, many with kitchenettes, fireplaces, and lake views. The garden is full of hammocks, flowers, and friendly llamas wandering around. If you’re looking for something unique, warm, and a bit magical, La Cúpula is worth every cent.
(€€€) Hostal Las Olas : Located right next to La Cúpula, Las Olas offers some of the most original rooms in Copacabana. Think round houses, curved walls, huge windows, and bright colourful designs. Each room is different, and most come with terraces facing the lake. It’s perfect if you love creative spaces and unique architecture.

Here are all your accommodation options in Copacabana
About the authors
We are Alex and Tina, a French-Serbian couple who met in China back in 2014. We spent three incredible years there before making France our home. Our shared passion for travel has been the heartbeat of our relationship for over 12 years, taking us across 44 countries and counting.
We launched TheDailyPackers in 2019 as a way to document our adventures. In 2026, we reached a major milestone by officially turning our blog into our full-time job. While we are still growing toward financial independence through this platform, every article we write is fueled by our mission to make your voyages easier through in-depth guides, honest advice, and the lessons we’ve learned from our own mistakes.
Our journey has not been without its storms. In 2023, our world changed forever when our first son, Poppy, was stillborn on November 25th. It was, and remains, the hardest chapter of our lives. In 2025, we were blessed with our second little boy, Milo. He has since joined our traveling tribe, and you’ll be seeing him—and the reality of traveling with a little one-on the blog more and more.
We hope to inspire you to explore the world with curiosity and resilience. Thank you for being part of our story.
You may also like those related posts
14 best things to do in Zadar, in Croatia, in 1 to 4 days
Trang An Boat Tours: Vietnam’s Most Scenic Attraction
Hiking Laguna de Los Tres: The Best Mount Fitz Roy Viewpoint
14 Best things to do in Punta Del Diablo, Uruguay, in 3 days
Mount Pilatus: How to Hike Lucerne’s best peak in 1-day
3 Best Places to Visit in April
7 best things to do in Gili Air, Lombok, in 3 days
16 Best things to do in Fes, Morocco, in 3 days or more
Pssst, did you know that…
If you purchase something through our links, we earn a small fee. However, you still pay the same. Win-win! And one day we may get to be full-time travel bloggers =)
Find Hotels with Booking.com
Do Yoga with KVY
Buy us a Coffee
Rent a car with DiscoverCars
Find Attractions with GetYourGuide
Find Flights with Expedia
Buy an eSIM with Airalo
Get insured with World Nomads
Get ready with Amazon.com